Your AI Edit Came Back Soft or Blurry — What Actually Fixes It
You got the style you asked for and the image looks like someone breathed on the lens. Faces are soft, edges are mush, and at full size there is nothing to look at.
There are two completely different reasons this happens, and the fix for one makes the other worse. Working out which one you have takes about ten seconds.
First, Which One Is It?
Open your source photo and the result side by side at full size.
If the source is sharp and the result is not, you asked for the softness. It is in your prompt, probably in words you did not read as “make this blurry”. Go to Fix 1.
If the source is soft too, nothing in the prompt is going to recover detail that was never captured. Go to Fix 3.
Most people assume they have the second problem and actually have the first.
Fix 1: Read Your Own Prompt for Softness Words
Style vocabulary is full of instructions to destroy detail, and they do not sound like it. “Dreamy”, “hazy”, “soft focus”, “faded”, “washed out”, “glowing”, “bloom”, “diffused light”, “heavy grain”, “halation”, “vignetting” — every one of those removes information from the image.
One of them is a style choice. Three of them stacked is a fog.
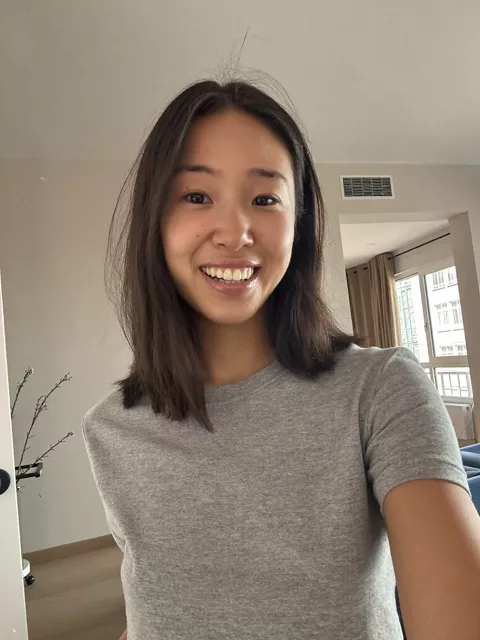
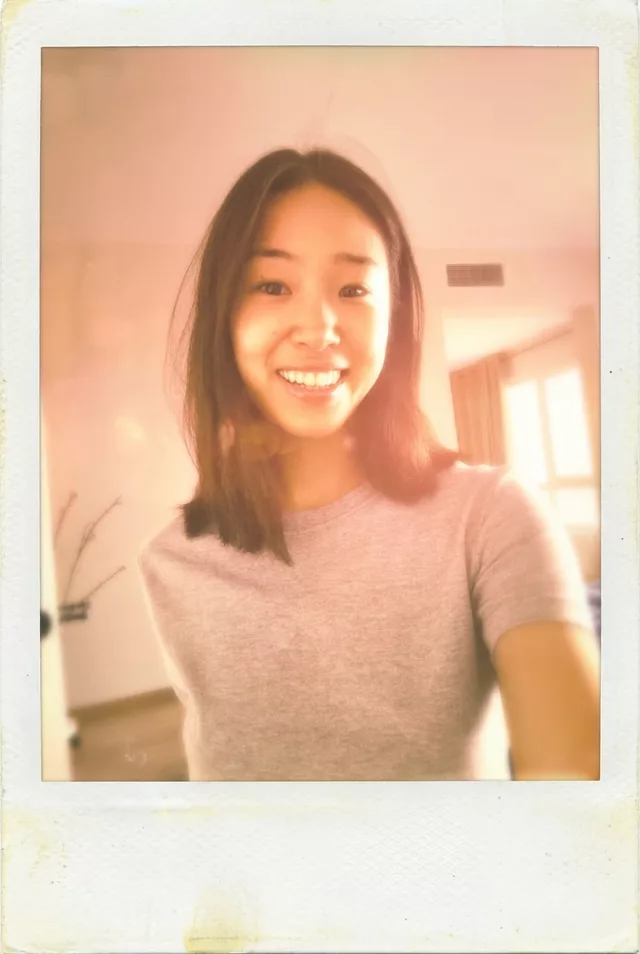
This is common enough to be worth a number: 39 of the 57 transform prompts in our own prompt library contain at least one softness or grain word, and six of them stack three or more. That is not a mistake — those looks need it — but it does mean the dial is usually already turned up before you add anything.
Delete one clause and run it again. Not all of them; one. Usually it is enough.
Fix 2: Know What “Sharpen It” Actually Does
Here is the part that surprises people. Asking an AI editor to sharpen or enhance a photo does not sharpen anything. It regenerates the region and hands back something sharper-looking, which is a different thing entirely.
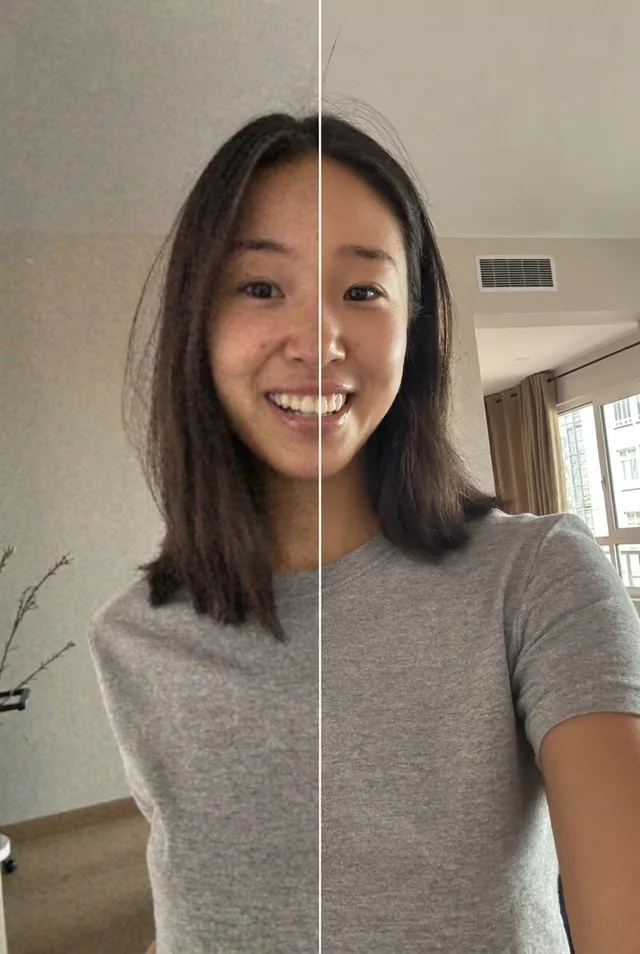
That is fine for a landscape. It matters a great deal for a face you know. Whatever comes back crisp is the model’s guess at what was there, and the guess drifts toward an average face.
So: use enhancement, but check the result against another photo of that person before you keep it, and prefer the gentlest setting that does the job.
Fix 3: The Source Sets a Ceiling
If the source is soft, you are choosing which model invents the missing detail — not whether it gets invented.
The realistic causes are old scans, screenshots of photos, images saved out of messaging apps, and anything re-shared enough times to go mushy. The test is simple: open the source at 100% and look at the eyelashes and the edge of the iris. If those are already soft, the result will be too, or it will be a face that is not quite yours.
Fix the source first where you can — shoot again, find the original file, or crop tighter so the face occupies more pixels. Our source photo checklist covers the rest.
Fix 4: Ask for Sharpness in Words That Work
Vague requests do not help. “Make it sharper” and “high quality” are not instructions a model can act on; they are hopes.
Name the thing you want detail in:
Keep fine detail in the eyes, eyelashes and individual hair strands.
Crisp focus on the face with visible skin texture and pores.
No soft focus, no haze, no glow, no blur on the face.
Shallow depth of field is fine, but the eyes must be tack sharp.
The last line matters. “No blur” on its own can flatten the background blur you actually wanted, so say where the sharpness belongs and where softness is welcome.
Fix 5: Keep Grain and Softness Apart
Film looks are where this goes wrong most often, because grain and softness arrive together in most people’s mental image of film — and in most prompts.
They are separable. “Fine film grain, crisp focus, high micro-contrast” gives you texture without fog. If you want the whole romantic haze, that is a choice; just make it deliberately rather than by accident.
Fix 6: Upscale Last, and Only Once
If the composition is right and it is only resolution you are short of, upscale the finished image rather than the source. Upscaling first gives the editor invented detail to work from, and it will rebuild on top of that.
One pass. Two upscalers in a row produce the plastic, over-etched look that is more obvious than the softness you started with.
Fix 7: Check at 100%, and Watch the Export
Judge sharpness at full size, never in a feed. And before you blame the model, check what your export did: a screenshot of a result, a re-save at low quality, or an upload to a platform that recompresses aggressively will all soften an image that was fine when generated. Save the original file the tool gives you.
Putting It Together
Audit your prompt before you touch anything else — the softness is usually something you asked for. Understand that enhancement redraws rather than recovers. Fix the source when the source is the problem. And when you do ask for sharpness, say which parts.
If you are assembling something in the prompt generator, its extras include film grain and shallow depth of field. Both are worth having; just do not add every one of them at once and then wonder where the detail went.
FAQ
Would a dedicated upscaler do better than asking the editor?
For pure resolution, usually yes — that is the one job it does. But it is still inventing detail, so the same caution applies to faces. Upscale after the edit, check the eyes, and stop at one pass.
The face is sharp but the background is mush. Is that a problem?
No, that is shallow depth of field and it is what most portrait prompts ask for. It only reads as a fault when the background is partly sharp in a way real optics would not produce — a blurred face with a crisp wall behind it, for instance.
Can I fix softness in a second pass?
Often, and it works better than most second passes, because you are not asking the model to preserve an identity so much as to add detail to one. Feed the result back with the Fix 4 clause and change nothing else. Compare the eyes before and after.